In qReveal, not only is there a hierarchy of how content is arranged, but specific content can also be “assigned” to one or more other pieces of content.
This is an important concept to understand when using qReveal because it determines what content shows up where.
Reviewing hierarchy
To better explain this, here’s the list of hierarchy again.
- Locations
- Menus or Price Lists
- Categories
- Items
- Modifiers
- Parent and child
In qReveal, menus or price lists, categories and items can have one or more parent assignments and one or more child assignments.
A parent assignment refers to the level above the current one while child ones refer to the one below.
Because locations is the top of the hierarchy, they cannot have a parent assignment. Likewise, modifiers, being the bottom of the hierarchy cannot have a child assignment.
Here’s an example:
- Categories can be assigned to one or more of its parent: menus or price lists. In other words, the category “Salads” could be assigned to both your “Lunch” and “Dinner” menu.
- On the other hand, one or more of categories’ children, which are items, can be assigned to the category. A real life example would be that the item “Grilled Chicken Salad” could be in both “Salads” and another category, such as “Quick Lunches.”
- It’s worth noting that the category “Quick Lunches” could be assigned to the “Lunch” menu only, since it doesn’t make sense to have an item heading with the word “Lunches” in it to appear on the dinner menu.
How assigning is helpful
All of this means that content can be used in multiple locations without having to re-enter it (note, however, if pricing differs at lunch or dinner, for example, you would need to create two separate items).

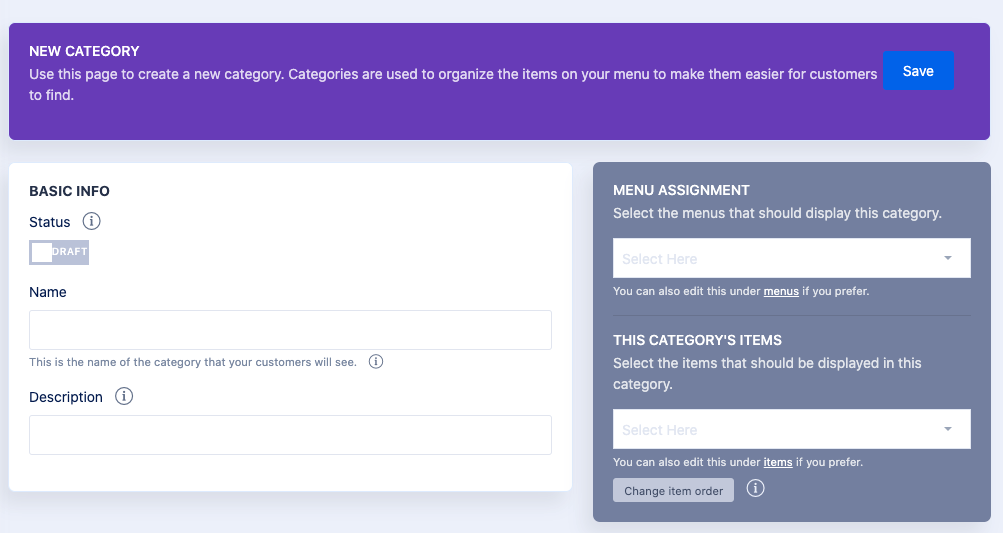
When working in the qReveal admin to create a new piece of content (such as category, as shown above), you’ll notice a dark gray box that lets you manage both child and parent assignments.
In the image above, which is at the category level, you can select both a menu assignment (the parent) and which items (the child) is assigned to this category.

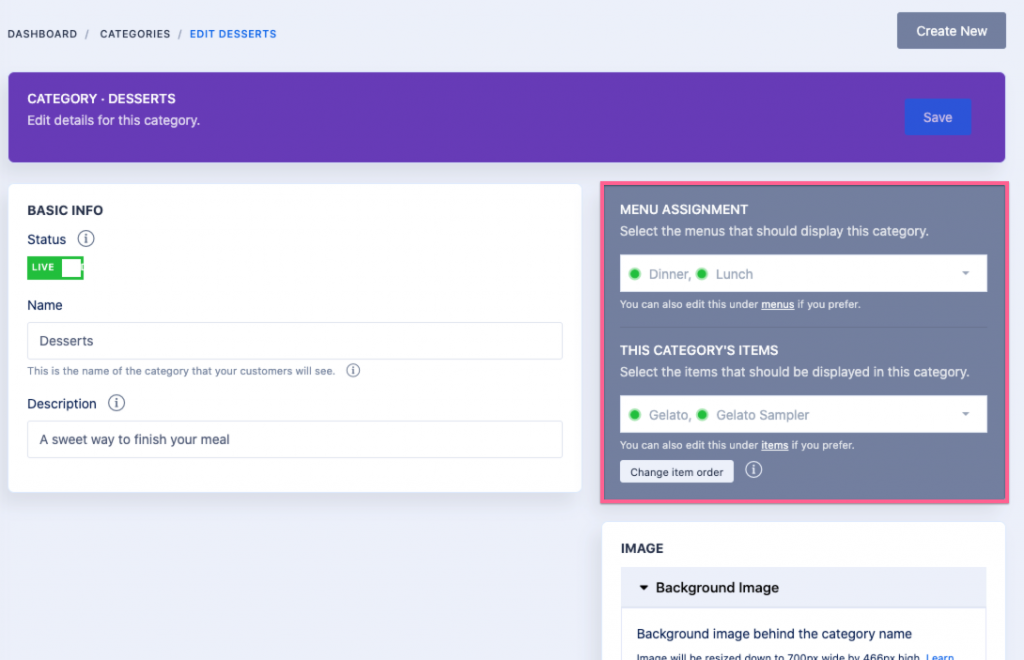
In the image above, you can see what the screen looks like when, in this example, the “Desserts” category is assigned to both the “Dinner” and “Lunch Menu” as well as having the items “Gelato” and “Gelato Sampler.”
How to assign

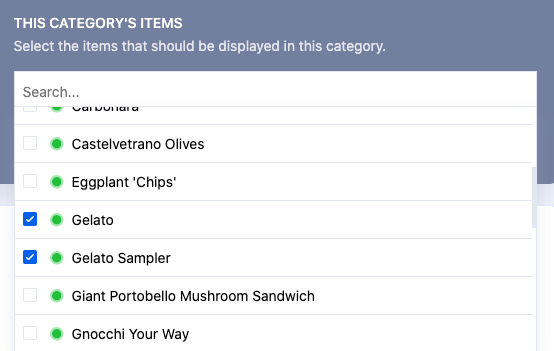
When you open an assignment dropdown, you will see all content available to assign to the current level you’re working on.
You can select one or more of them by clicking the checkbox next to each one. You should have at least one piece of content checked for your customers to be able to view everything properly.

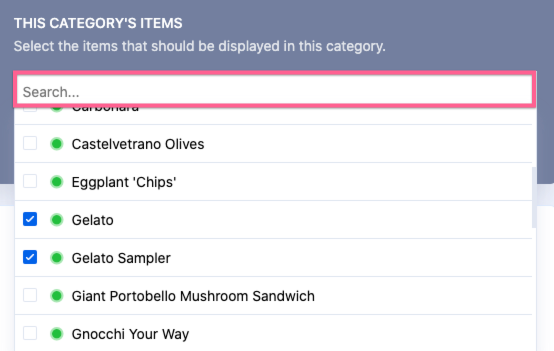
In the dropdown, content is sorted alphabetically from top to bottom by name. You can also enter a search time at the top of the dropdown to find exactly what you need.
Assigning child and parent content from same screen
Being able to manage both child and parent assignments from menu or price lists (level 2), categories (level 3) and items (level 4) is an important concept to remember.
In this example, if you already have an item created that you want to assign to a category, you can do it from the category or item. Any changes you make in either location will update everywhere automatically.
Menus and price lists (level 1) will only have a child assignment dropdown while modifiers (level 5) will only have a parent assignment dropdown.
